Blog

  • Smart Plug Scheduling Made Easy: Automate Your Home in Minutes

    Smart Plug Scheduling Made Easy: Automate Your Home in Minutes

    Your electricity bill just jumped 15% this summer, and you’re probably wondering where all that extra money went. Here’s a shocking fact: regular electricity can cost you more if you are not aware of Smart Plug scheduling.

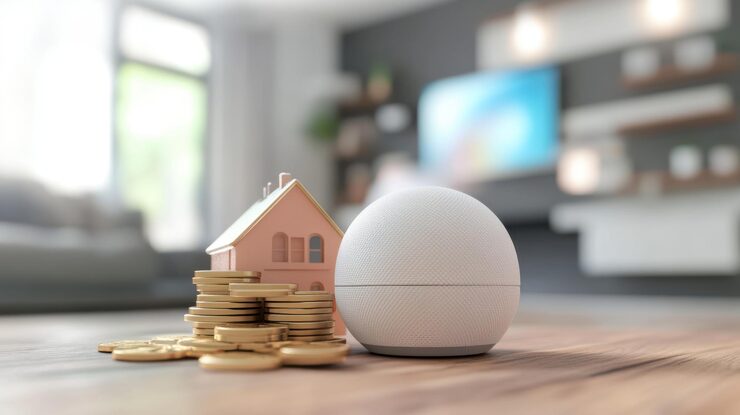
    The smart plug market is expanding. Millions of Americans are finding out that smart plug scheduling can cut their energy costs by 20-30% without really changing their lifestyle.

    Smart homes use way less energy than regular homes, and it all starts with one simple device that costs less than a pizza. This is the time to become advanced with better savings. Smart home automation is the easiest way to get into this stuff, and here’s exactly how you can do it.

    What is Smart Plug Scheduling, and Why Do You Need It?

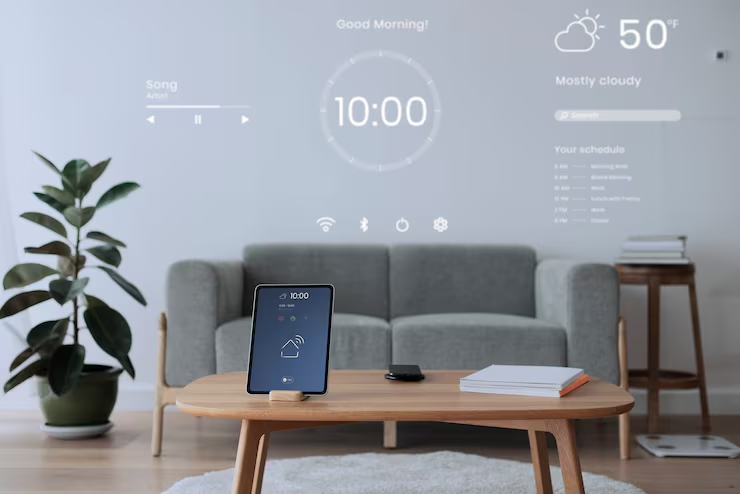
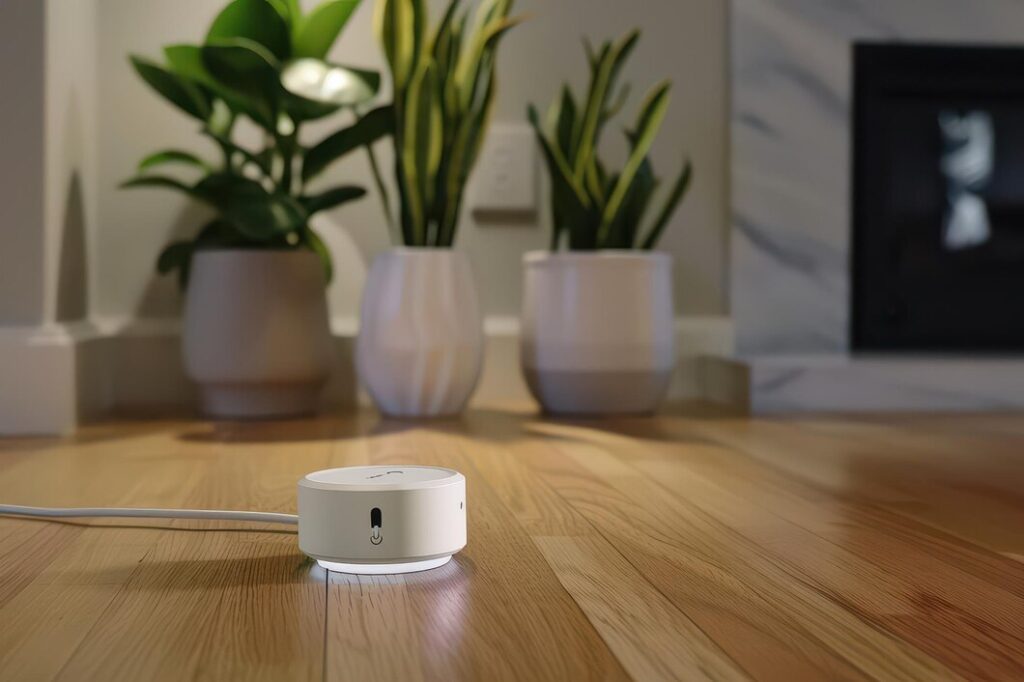
    Smart plug scheduling just means you can control when your devices turn on and off automatically. No more forgetting to turn off that space heater or wondering if you left the coffee maker on all day. A Wi-Fi smart plug connects to your home internet and follows schedules you set up in an app on your phone.

    The best part? A smart plug only uses 1-2 watts of power itself, so it pays for itself super fast. Think of it as giving your dumb appliances a brain that remembers to turn them off when you forget.

    Smart home automation doesn’t have to be complicated or expensive. You can start with just one plug and build from there. The tech works by connecting to your Wi-Fi and taking commands from your phone, even when you’re not home.

    The Hidden Energy Vampires Draining Your Wallet

    Here’s what’s really eating up your electricity bill. The average American home has around 40 devices plugged in all the time. A lot of this power is wasted even when you’re not using them. This “phantom power” costs you real money:

    • Gaming consoles: $150-200 per year just sitting there in standby mode.
    • Cable boxes: $100 a year if you leave them on 24/7.
    • Desktop computers: $175 per year if they never get turned off.
    • Old TVs and entertainment systems: $80-120 per year.
    • Phone chargers and small appliances: $50-100 per year combined.

    That adds up to $400-600 in wasted electricity every year for most families. A $15 smart plug can eliminate most of this waste automatically.

    How to Set Up Your First Smart Plug in 10 Minutes?

    Smart Plug Scheduling Made Easy: Automate Your Home in Minutes

    Getting started with smart plug automation is easier than setting up a new phone. Here’s the step-by-step process:

    • Step 1: Pick Your First Device
      Start simple. A coffee maker, a lamp, or your phone charging station are great first choices. Don’t try to hook up your big heaters or complex electronics until you get the hang of it.
    • Step 2: Choose Your Smart Plug Type
      This depends on what you already use at home.
      • A Google Smart Plug works best if you already use Google Home.
      • There are many smart plugs for Alexa if you have Amazon Echo devices.
      • Universal plugs work with multiple systems if you’re not sure.
    • Step 3: Download the App
      Most smart plug timer app setups take about 5 minutes. The app will walk you through connecting the plug to your home Wi-Fi. You’ll need your Wi-Fi password ready.
    • Step 4: Create Your First Schedule
      This is where you set up the smart plug. Instead of you remembering to turn things off, you just set rules for the plug to follow. For example:
      • “Turn off TV and all gaming stuff every night at midnight.”
      • “Start the coffee maker Monday-Friday at 6:30 AM.”
      • “Turn on living room lamps when the sun sets.”

    Advanced Features: Voice Control and Remote Access

    A voice control smart plug setup makes your new smart home system even easier to use. Once you connect it to Alexa or Google Home, you can just say things like

    • “Alexa, turn off the living room lamp.”
    • “Hey Google, turn on the coffee maker.”
    • “Alexa, turn off all the bedroom plugs.”

    Remote plug control means you can manage your home from literally anywhere with your phone. Did you forget to turn off a fan after leaving for work? No problem. Open the app and turn it off. Are you going to be late getting home? Turn on some lights from your car so you don’t walk into a dark house.

    Common Mistakes That Cost You Money

    A lot of people get excited and make a few simple mistakes that can be frustrating. Learning from them now will save you time and make sure your smart home automation actually works for you. Avoid these common slip-ups.

    • Don’t Over-Automate Right Away. The biggest mistake people make is buying a dozen plugs and trying to make everything smart at once. Start with one or two devices you always forget to turn off. Add more plugs slowly as you get used to it.
    • Check Device Compatibility. Some things just don’t work well with a Wi-Fi smart plug. Anything with a mechanical on/off switch or complex safety features might not turn back on right after the plug gives it power.
    • Update Your Schedules. Your routine changes. Your work schedule changes, and seasons change. Look at your plug schedules every few months to make sure they still make sense for you.
    • Don’t Forget Manual Control. Make sure you can still turn your stuff on and off by hand if you need to. The best systems help you; they don’t trap you.

    Popular Smart Plug Options

    There are a ton of brands out there, but you don’t need to get lost in reviews. Most people just need a reliable plug that works with the system they already have, like Alexa or Google. Here are the most popular choices that just work.

    • Amazon Smart Plug: Works perfectly with Alexa devices and usually costs around $25. The setup is done right inside the Alexa app and takes minutes. This is one of the most popular smart plugs for Alexa.
    • TP-Link Kasa Plugs: These are great because they work with Alexa, Google Home, and their own app. They often have energy monitoring features and cost between $10 and $20 each.
    • Google Nest Plugs: If you’re building a Google-based home, a Google smart plug is the best fit. They integrate perfectly but are a bit more expensive, around $20-30.

    For the smart plug timer app setup, most of these brands are pretty similar. The key is to try and stick with one system (like all Google or all Alexa) so all your devices can talk to each other easily.

    Building Your Complete Smart Home System

    Smart Plug Scheduling Made Easy: Automate Your Home in Minutes

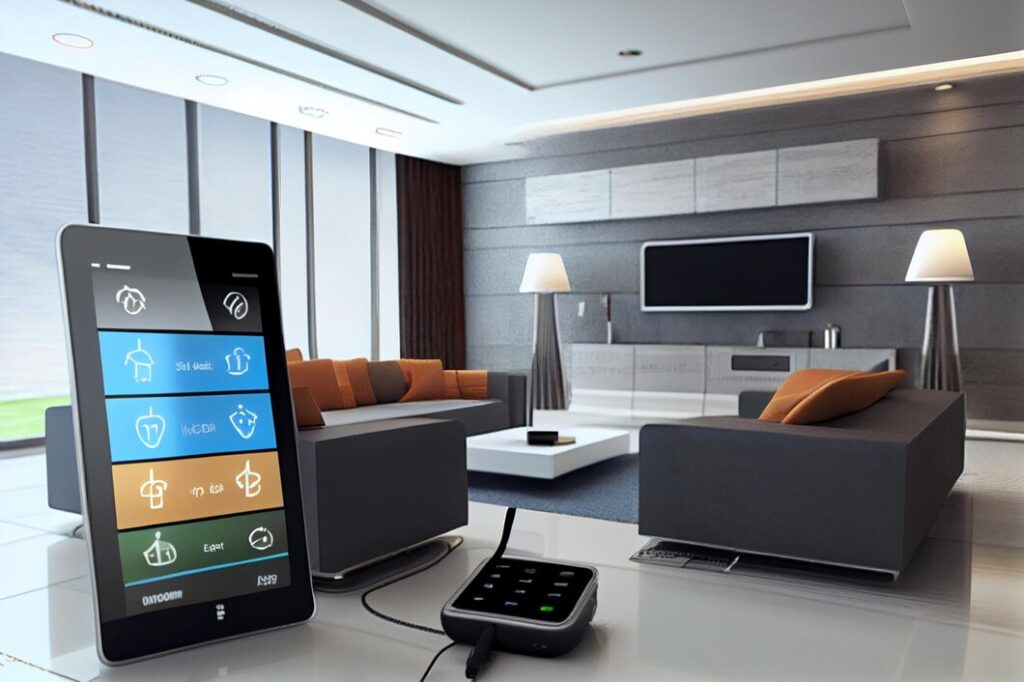
    Smart plug automation is just the beginning. Once you see how easy it is and how much you save, you can expand your smart home system to include:

    • Smart thermostats can save 10-15% on heating and cooling
    • Smart light switches
    • Smart water heater controllers
    • Smart sprinklers for your lawn

    Each new device just adds to the savings and makes your home smarter and your life a little easier.

    The Bottom Line: Start Today, Save Tomorrow

    Over 83 million homes in North America had smart devices by 2028, and the smart plug is the most popular way to start. The technology isn’t complicated, the setup is not hard, and the savings start right away.

    The time to start is now. Every day you wait is another day that “phantom power” is draining money from your wallet. The initial cost is small, and the benefits just keep adding up over time.

  • Smart Home Hacks: Build Your Own Tech-Friendly Space

    Smart Home Hacks: Build Your Own Tech-Friendly Space

    The global smart home market was valued at $127.80 billion in 2024, and experts predict it’ll reach $162.78 billion by 2025. That’s a massive jump, showing how Americans are getting serious about home automation. But here’s the thing – you don’t need to spend thousands to get started with smart home hacks.

    About 69.91 million US households are already using smart devices, and that number keeps growing. The DIY smart home trend is taking off because people realize they can build their own tech setup without hiring expensive installers or buying premium systems.

    Voice-controlled devices and IoT devices for the home are becoming cheaper and easier to install. Revenue in the smart home market is projected to reach US$174.0bn in 2025, with an annual growth rate of 9.55%. This means more options and better prices for homeowners who want to upgrade their spaces.

    What Makes a Home “Smart” in 2025?

    A smart home isn’t just about having gadgets everywhere. It’s about creating a system where your devices talk to each other and make life easier. Think of it like having a helpful assistant that never sleeps and always remembers your preferences.

    The best smart gadgets of 2025 include devices that actually solve problems. We’re talking about lights that turn on when you walk in, thermostats that adjust temperature based on your schedule, and security cameras that send alerts to your phone. These aren’t luxury items anymore; they’re practical tools.

    Modern IoT devices for the home work together in what experts call an ecosystem. Your smart doorbell can trigger your voice-activated lights to turn on when someone approaches. Your smart thermostat can work with your security system to save energy when nobody’s home.

    The key difference between a real smart home and just having random gadgets is integration. Everything should work together smoothly, not require separate apps for every single device.

    Essential Smart Home Devices for Beginners

    Smart Home Hacks: Build Your Own Tech-Friendly Space

    Starting your budget smart home journey doesn’t mean buying everything at once. The smart approach is to pick devices that fix your biggest daily annoyances first.

    Smart Thermostats

    A smart thermostat is usually the first device experts recommend because it pays for itself through energy savings. These devices learn when you’re home, adjust temperatures automatically, and can be controlled from anywhere. Most homeowners save 10-15% on heating and cooling costs.

    Popular options include the Nest Learning Thermostat ($249) and Ecobee SmartThermostat ($199). Both work with major voice-controlled devices and give you detailed reports about your energy usage.

    Smart Plugs

    Smart plug uses are endless, and they’re perfect for beginners. For $10-15 each, you can make any regular device “smart.” Plug your coffee maker, lamps, fans, or space heaters into these devices to control them with your phone or voice commands.

    You can set schedules so your coffee starts brewing before you wake up, or turn off all electronics when you leave for work. Smart plugs are probably the easiest way to dip your toes into home automation.

    Voice-Activated Lights

    Voice-activated lights have come a long way from basic on/off switches. Modern smart bulbs can dim, change colors, and work with schedules. You can create scenes like “Movie Night” that dims all lights to 20% or “Good Morning” that gradually brightens your bedroom.

    Brands like Philips Hue are premium options, while Wyze and Sengled offer budget smart home alternatives starting around $10 per bulb. The real magic happens when you connect them to voice-controlled devices like Alexa or Google Assistant.

    DIY Smart Home Setup: Room-by-Room Guide

    Building a DIY smart home works best when you tackle one room at a time. This approach lets you learn what works for your lifestyle before expanding to other areas.

    Living Room

    Start with your living room since this is where most families spend their time. A smart TV or streaming device creates the foundation. Add voice-controlled devices like Amazon Echo or Google Nest for music and device control.

    You can control table lamps, fans, and entertainment systems without getting up from the couch. Set schedules so everything turns off automatically at bedtime.

    Kitchen

    Your kitchen offers tons of automation opportunities. Smart appliances like programmable coffee makers, slow cookers, or air fryers that connect to your phone make daily routines easier.

    A smart smoke detector like Nest Protect ($119) doesn’t just beep: it sends alerts to your phone and can tell the difference between smoke and steam from cooking.

    Smart plug uses in kitchens include controlling small appliances on schedules. Your coffee maker can start brewing when your alarm goes off, or your slow cooker can begin cooking a few hours before you get home from work.

    Bedroom

    Transform your bedroom into a smart sanctuary focused on better sleep and easier mornings. Voice-activated lights can gradually brighten to wake you up naturally, while smart blinds can open and close automatically.

    A sunrise alarm clock simulates natural daylight to help you wake up more gently. Pair this with voice-controlled devices that can start your morning playlist or give you the weather forecast while you’re getting ready.

    Cost-Effective Smart Home Hacks

    Smart Home Hacks: Build Your Own Tech-Friendly Space

    Building a budget-smart home doesn’t require huge upfront costs. If you want to convert your whole home, expect to spend around $2,000-$5,000 on average. But DIY smart home setups can start with just $50 for basic devices.

    Affordable Starting Points

    Begin with these budget-smart home devices that give immediate value:

    • Smart plugs ($10-15): Make any device controllable instantly
    • Smart bulbs ($8-25): Easy lighting automation without electrical work
    • Motion sensors ($15-30): Automatically trigger lights or send alerts
    • Smart speakers ($25-50): Voice control hub for your growing system

    Strategic Device Selection

    Instead of buying the most expensive options, focus on devices that solve your biggest daily problems. If you always forget to turn off lights, prioritize smart switches. If home security worries you, start with a video doorbell.

    Many smart home hacks enthusiasts use the “rule of three” – when you do the same manual task three times daily, that’s perfect for automation.

    Platform Compatibility Tips

    Choose devices that work with major platforms like Amazon Alexa, Google Assistant, or Apple HomeKit. This ensures your IoT devices for the home can communicate and gives you flexibility to expand later.

    Avoid devices that only work with their own apps unless they offer unique features. The goal is building an integrated system, not collecting isolated gadgets.

    Common Smart Home Mistakes to Avoid

    Even tech-savvy homeowners make mistakes when starting their DIY smart home journey. Learning from these common problems can save you time, money, and frustration.

    Over-Automating Too Fast

    The biggest mistake is trying to automate everything at once. Gen Xers have the highest ownership of smart devices (90% own at least one), but successful smart homes are built slowly.

    Start with one or two devices that solve real problems. Master these before adding complexity. A home where every light switch needs an app isn’t necessarily better than a home with regular switches.

    Ignoring Wi-Fi Network Needs

    Your smart home is only as good as your internet connection. Many homeowners install multiple IoT devices in their home without upgrading their Wi-Fi, leading to connection issues and device failures.

    Consider investing in a mesh Wi-Fi system if you have a large house or dead zones. Systems like Eero, Nest Wifi, or Orbi create strong coverage throughout your home.

    Forgetting About Security

    Smart home security isn’t just cameras and alarms; it’s also protecting your devices from hackers. Change default passwords on all devices, keep software updated, and use strong passwords for your accounts.

    Create a separate network for smart devices if your router supports it. This keeps your voice-controlled devices separate from computers and phones with personal information.

    Maximizing Your Smart Home Investment

    Installing smart devices can increase your home’s resale value by 5%, according to The CE Shop. But the real value comes from daily convenience and long-term savings.

    Energy Savings and Efficiency

    Smart homes reduce energy waste through automated systems and monitoring. Smart thermostats typically save 10-15% on heating and cooling costs, while smart lighting eliminates lights left on accidentally.

    Create schedules that match your actual usage instead of leaving devices running 24/7. Your smart water heater doesn’t need to maintain temperature when everyone’s at work.

    Integration and Growth Strategy

    Plan your expansion thoughtfully. Choose one primary platform (Alexa, Google, or Apple) and focus on devices that work well with your chosen system.

    Keep track of your setup as you build it. Document device passwords, network settings, and automation rules. This makes troubleshooting easier and helps if you need to reset devices.

    The Future of Budget Smart Homes

    Smart Home Hacks: Build Your Own Tech-Friendly Space

    The smart home industry keeps evolving with new tech and lower prices, making automation accessible to more people. By 2025, there will be over 25 billion IoT connections worldwide.

    Artificial intelligence is getting smarter, allowing homes to predict your needs instead of just responding to commands. Your home might automatically adjust the temperature before you arrive or start coffee when your alarm goes off.

    The key to success with home automation isn’t having the latest gadgets; it’s creating a system that actually improves your daily life. Start small, focus on solving real problems, and expand gradually as you learn what works.

    Whether you’re beginning with a single smart bulb or planning whole-house automation, the most important step is getting started. Your tech-friendly space is waiting to make life more convenient, secure, and efficient.

  • Personalized Decor: Make Your Space Truly Yours

    Personalized Decor: Make Your Space Truly Yours

    Americans are ditching cookie-cutter home designs faster than ever before. The personalized home decor market is booming, hitting $165.4 billion in 2024 and expected to reach $330.6 billion by 2034. That’s a massive 7.2% growth every year, showing just how much people want their homes to reflect who they really are.

    Why this sudden shift? People are tired of walking into spaces that look like hotel rooms or catalog pages. They want homes that tell their story, showcase their personality, and make them feel genuinely comfortable. With Americans now spending an average of $1,598 annually on home decorating, it’s clear that making spaces personal has become a priority.

    Why Personalized Home Decor Matters

    Your home should feel like YOU. When your space reflects your personality, something interesting happens: you feel more relaxed, more creative, and way more comfortable in your own skin.

    Millennials are leading this trend, spending about $1,771 per year on home decor – that’s 23% more than older generations. They’re not just buying stuff; they’re investing in spaces that support their mental health and express their values.

    Unique home decor isn’t about following the latest Pinterest trend. It’s about creating a space that works for your lifestyle, supports your daily routines, and makes you smile when you walk through the door. Whether you’re into minimalist vibes or maximalist energy, the key is making choices that feel authentic to you.

    Building Your Personal Style from Scratch

    Personalized Decor: Make Your Space Truly Yours

    Before you start buying anything, you need to figure out what actually makes you happy. This sounds simple, but most people skip this step and end up with rooms that look nice but don’t feel right.

    Start by thinking about spaces where you’ve felt really comfortable. Maybe it was a coffee shop with exposed brick walls, a friend’s comfortable living room, or even a hotel room that just felt perfect. What made those spaces work?

    Key things to think about:

    • Colors that make you feel good: Some people need bright, energizing colors, while others prefer calm, neutral tones.
    • Textures you love touching: Soft blankets, smooth wood, rough stone – what feels good to you?
    • How you actually live: Do you entertain a lot? Work from home? Have pets or kids?
    • Things that make you smile: Photos, books, collections, plants, artwork

    The best custom home decor tells your story. Maybe you’re a traveler who wants to display souvenirs, a reader who needs beautiful bookshelves, or someone who loves plants and wants to create an indoor jungle. Your space should support what you love doing.

    DIY Home Decor Ideas That Actually Work

    You don’t need to spend thousands to make your space feel personal. Some of the best DIY home decor projects cost under $50 and can be done in a weekend. Plus, when you make something yourself, it automatically becomes more meaningful.

    • Custom Wall Decor is probably the easiest place to start. Gallery walls are still popular because they work. Mix family photos with art prints, postcards from trips, and maybe some pieces you’ve created yourself. The trick is to lay everything out on the floor first, then transfer it to the wall.
    • DIY wall decor can be as simple as framing fabric samples in different sizes, creating a photo collage, or even hanging plants in interesting containers. One popular trend is creating a “memory wall” with ticket stubs, photos, and small mementos from important events.

    Textile projects give you the biggest visual impact for your effort. You can:

    • Dye plain curtains or pillow covers in colors you love
    • Add embroidery or patches to existing pillows
    • Create custom throw blankets by sewing different fabrics together
    • Make wall hangings using rope, yarn, or fabric strips

    Furniture makeovers turn boring pieces into statement items. A plain dresser becomes interesting with new paint and hardware. Old chairs get new life with different fabric on the seats. Even something as simple as adding decorative contact paper to the inside of bookshelves can make a huge difference.

    Smart Ways to Use Technology

    Personalized Decor: Make Your Space Truly Yours

    Home decor trends for 2025 include lots of tech integration, but it doesn’t have to be complicated or expensive. Smart home devices are getting more affordable and easier to use, making personalization more accessible.

    Smart lighting systems let you change the mood of any room instantly. You can program different lighting scenes for morning coffee, work time, or evening relaxation. Some systems even change automatically based on the time of day or weather outside.

    Digital picture frames have gotten really good lately. Instead of choosing just one photo for a spot, you can rotate through hundreds of your favorites. This is perfect for people who take lots of photos but never know which ones to display.

    Voice-controlled devices can now manage more than just music. You can control blinds, adjust plant watering systems, and even change room fragrances with simple voice commands. This makes your space more responsive to what you need throughout the day.

    Handmade Home Decor Items on Any Budget

    Creating personalized spaces doesn’t require unlimited money. With 62% of Gen Z preferring sustainable brands, many successful DIY home decor strategies also help the environment through reusing and upcycling.

    • Thrift store finds offer amazing opportunities for customization. Look for solid wood furniture, interesting shapes, or quality materials, then transform them to match your style. A $15 side table can look like a $150 piece with the right paint job and new handles.
    • Plant personalization is budget-friendly and keeps giving back. Different plants match different personalities: succulents for low-maintenance people, herbs for cooking enthusiasts, or flowering plants for those who love color. Make custom planters using materials that reflect your style.
    • Seasonal decorating keeps things fresh without constant spending. Store seasonal items and rotate them every few months. This gives your space regular updates while maximizing what you already own.
    • Community swaps with friends can introduce new elements without spending money. Organize decoration swap parties where everyone brings items they want to change out.

    Making Small Spaces Feel Personal

    Personalized Decor: Make Your Space Truly Yours

    Limited space doesn’t mean limited personality. Small spaces often showcase personal style better because every item has to earn its place and serve multiple purposes.

    • Vertical space is your best friend in small homes. Use walls for more than just hanging pictures. Install floating shelves for displaying meaningful objects, create vertical gardens, or use wall-mounted storage that looks decorative.
    • Multi-functional pieces solve space problems while showing your style. A vintage trunk works as both a coffee table and storage. A bookshelf can divide spaces while displaying your personality through books and objects.
    • Mirrors make small spaces feel bigger while reflecting your style. Choose frames that match your taste: ornate vintage for traditional looks, sleek metal for modern vibes, or colorful painted frames for eclectic personalities.

    Ethnic Home Decor Ideas and Cultural Expression

    Your cultural background and heritage can be a rich source of unique home decor inspiration. Incorporating elements from your cultural background or cultures you admire and have experience with adds depth and meaning to your space.

    Traditional textiles make beautiful wall hangings, throw pillows, or table runners. Vintage or antique pieces from your family’s heritage can become focal points in modern settings. Cultural art, pottery, or handcrafted items tell stories and start conversations.

    The key is incorporating these elements thoughtfully rather than creating a museum display. Mix cultural pieces with modern elements to create spaces that feel lived-in and authentic rather than like themed rooms.

    Sustainable and Conscious Decorating

    Environmental awareness increasingly influences how people personalize their spaces. Supporting local artisans, buying vintage pieces, and upcycling existing items creates truly unique decor while being responsible.

    • Vintage and antique pieces provide unique personalization while supporting sustainability. These items often have better quality than new alternatives and come with interesting histories that add character to your space.
    • Local artisan support creates one-of-a-kind decor while supporting your community. Commissioned pieces from local artists, handmade pottery, or custom textiles ensure your space has items nobody else has.
    • Upcycling projects turn discarded items into personalized treasures. Old windows become picture frames, vintage suitcases transform into storage, and worn-out clothing can become pillow covers or wall art.

    Getting Started: Your Action Plan

    Personalized Decor: Make Your Space Truly Yours

    Successful personalization happens gradually. Rushing usually leads to impulse purchases that don’t really fit your style or needs.

    • Months 1-2 (Planning Phase): Document what you currently have and identify what actually makes you happy versus what’s just taking up space. Create inspiration collections, but focus on feelings and moods rather than copying specific looks.
    • Months 3-4 (Foundation Building): Invest in key anchor pieces, maybe a statement rug, quality lighting, or artwork that speaks to you. These foundational elements will guide future decisions and tie everything together.
    • Months 5-6 (Personal Touches): Add personality through accessories, textiles, and smaller decorative objects. This is when DIY home decor ideas really shine; experiment with projects, rearrange existing pieces, and fine-tune the overall feel.
    • Ongoing (Evolution): Personal style changes, and your space should too. Schedule regular reviews to assess what’s working and what isn’t. Replace items that no longer serve you and gradually add new elements that reflect your growth.

    How to Make It Happen?

    The personalized home decor trend reflects people’s desire for authentic spaces that support their real lives. Your space should tell your story, support your daily routines, and evolve as you grow.

    The most beautiful homes aren’t necessarily the most expensive or perfectly coordinated ones. They’re spaces that feel authentic, support daily life, and reflect the people who live there. Start small, think personal, and trust your instincts.

    Whether you’re working with a tiny apartment or a large house, a limited budget or plenty to spend, the principles stay the same: choose items that resonate with who you are, invest in quality pieces that will last, and never underestimate how personal touches can transform any space into a real home.

    FAQs:

    1. Why is personalized home decor on the rise?

    People want spaces that feel true and unique to them, and not just some generic, cookie-cutter space somewhere. Personalized home decor enhances comfort, creativity, and mental health.

    2. How much do Americans shell out for home decor each year?

    In the United States, people spend an average of $1,598 a year on home decorating; that number jumps to about $1,771 for millennials — who are helping lead the charge in this regard.

    3. Must personalized decor options be costly?

    No, there are plenty of DIY and thrift store projects that can be personally meaningful and low cost. Do-able projects including gallery walls,dyeing fabric and upcycling furniture could result in customized home decor that’s easy on the wallet.

    4. How is technology making house decor more customizable?

    And smart lighting, digital picture frames and voice-controlled gadgets provide customizable features that shape living spaces to moods and routines, bringing personalization within reach.

    5. Surely, personal design can work in small spaces?

    Absolutely, small spaces can feel very personal with vertical shelving, multifunctional pieces, mirrors and thoughtfully selected accents that reflect the occupant’s personality without overwhelming their environment.

  • Why Curved Furniture Is Taking Over Interior Design

    Why Curved Furniture Is Taking Over Interior Design

    When sales for a style of furniture jump 34% in just one year and a new report shows that nearly half of all interior designers (47%) are calling it the biggest trend for 2025, you know it’s something to pay attention to. We’re talking about curved furniture, and the stats prove that Americans are officially obsessed. 

    This isn’t just about a few round coffee tables. It’s a massive shift away from the sharp, boxy look that dominated our homes for decades. Americans are now actively choosing soft-edge furniture and organic-shaped furniture for their living rooms, bedrooms, and even home offices.

    But why is everyone suddenly dropping their old square tables for round-edge furniture? The answer is bigger than just style.

    The Science Behind Why We Love Curves

    Our brains are wired to like organic-shaped furniture better than sharp, angular pieces. It’s not just personal taste; there’s real science behind this preference.

    Research from the University of Toronto tracked 200 people for six months and found something pretty amazing. People in rooms with curved home decor had 15% lower stress levels than those surrounded by sharp-edged furniture. Their cortisol (stress hormone) levels dropped significantly when they spent time in spaces with round-edge furniture.

    Here’s what happens when you add curved furniture to your home:

    • Better flow: No more bumping into sharp corners when you’re walking around
    • More conversation: Living room curved couch setups naturally bring people together.
    • Safer for kids: Soft edges mean fewer accidents and injuries
    • Calmer feeling: Curves make any room feel more relaxing and welcoming.

    This makes sense from an evolutionary standpoint too. In nature, dangerous things usually have sharp edges (think thorns, cliffs, predators), while safe, nurturing things are curved (water, clouds, smooth stones). Our subconscious picks up on these cues and relaxes around curves.

    Also Read: Is a Smart Home Right for You? Pros & Cons to Know

    Furniture Trends 2025: The Numbers Don’t Lie

    Furniture Trends 2025: The Numbers Don't Lie

    The curved furniture market is growing right now. The global furniture industry was worth $568.60 billion in 2024 and is expected to hit $878.14 billion by 2032. A big chunk of this growth is coming from curved interior design pieces.

    Key statistics that show this trend is real:

    • Premium pricing: Curved furniture typically costs 20-30% more than regular angular pieces, but people are still buying it because of the luxury lifestyle it offers. 
    • Online boom: E-commerce sales of round-edge furniture grew 34% in 2024.
    • Millennial preference: 68% of millennial homeowners prefer soft-edge furniture over traditional square designs
    • Business adoption: Hotels and restaurants using curved home decor report 18% better customer satisfaction.

    The online home decor market grew 11.8% between 2023 and 2024, with projections showing 12.24% annual growth, according to Halmon Thompson. Much of this is driven by younger Americans who want organic-shaped furniture in their homes.

    Modern Curved Sofa and Other Popular Pieces

    Interior design trends 2025 isn’t just about one type of furniture. Americans are loving the curves throughout their entire homes.

    • Living room pieces are leading the way. The modern curved sofa has become the new must-have item, replacing traditional L-shaped sectionals. These sofas create natural conversation areas and can actually seat more people in less space. A living room curved couch that seats 8 people comfortably takes up the same floor space as a regular sectional that only seats 6.
    • Round coffee tables are pairing perfectly with curved seating. They eliminate that harsh rectangle-on-rectangle look that dominated living rooms for years. Plus, they’re safer; no sharp corners to bump into during late-night trips to the kitchen.
    • Dining room furniture is also getting the curve treatment. Oval dining tables and curved banquettes are becoming super popular, especially in open-concept homes where visual flow matters. These pieces make dinner feel more intimate and work better in spaces where the dining room connects to other areas.
    • Bedroom furniture with curves includes rounded nightstands, curved headboards, and soft upholstered benches. It helps create a more restful environment that actually promotes better sleep.

    Even home office furniture is going curved. With remote work becoming permanent for many Americans, curved desks and ergonomic chairs with soft-edge furniture design are gaining popularity.

    Why Curved Furniture Actually Works Better

    Furniture Trends 2025: The Numbers Don't Lie

    Beyond looking good, curved interior design offers real practical benefits that traditional angular furniture can’t match.

    Space efficiency is probably the biggest advantage. Round-edge furniture can fit more people in smaller spaces. A curved dining table seats more guests than a rectangular one of the same size. A living room curved couch maximizes seating while taking up less visual space.

    Flexibility in placement gives homeowners way more options. Unlike square furniture that has to align with walls and corners, curved furniture works anywhere in a room. You can put a curved accent chair in a corner, by a window, or floating in the middle of the room – it looks good everywhere.

    Timeless appeal makes organic-shaped furniture a smart investment. While ultra-modern angular designs can look dated quickly, curves have staying power. A well-made curved wooden dining table will still look stylish years from now, even as furniture trends in 2025 evolve into something new.

    How Manufacturing Makes Curved Furniture Affordable

    Modern technology has made curved home decor way more affordable than it used to be. What once required expensive handcrafting can now be mass-produced without losing quality.

    Steam-bending technology lets manufacturers create smooth curves in solid wood without weakening the structure. 3D printing and CNC machines can cut precise curved components that would’ve been impossible to make cost-effectively just ten years ago.

    These advances mean:

    • Every piece matches exact specifications.
    • Less material waste during production
    • Complex curved designs that used to require handwork
    • More sustainable manufacturing processes

    New materials also support the curved furniture trend. Composite materials bend easier while staying strong, and better adhesives create seamless curved pieces that look as good as solid wood.

    Adding Curved Interior Design to Your Home

    You don’t need to replace everything to follow the interior design trends 2025. Smart integration can transform your space gradually.

    Start with one big piece like a modern curved sofa or round dining table. This gives your room a new focal point without overwhelming your existing decor. Place it where you can see it from multiple angles; curves look different depending on where you’re standing.

    Add smaller curved elements through accessories. Curved mirrors, round side tables, and soft ottomans support your main curved furniture while adding functionality.

    Balance is key; you still need some straight lines to keep the room from feeling too soft or unstable. A few angular elements provide visual anchors.

    Think about traffic flow when placing round-edge furniture. These pieces should help people move through your space more easily, not block pathways.

    Styling Soft-Edge Furniture Right

    Curved furniture needs different styling than traditional pieces. The key is working with the natural flow instead of fighting it.

    Create rhythm by repeating curved shapes throughout your space. If you have a living room curved couch, add curved wall art, round lamps, or circular rugs. This repetition looks intentional, not accidental.

    Lighting matters with organic-shaped furniture. Use soft, diffused lighting that follows the furniture’s contours. Harsh directional lighting creates shadows that work against the soft aesthetic.

    Choose materials carefully. Smooth fabrics like cotton blends and brushed metals complement curved forms. Avoid overly textured materials that compete with the furniture’s smooth lines.

    Size correctly;oversized curved home decor can dominate a room, while pieces that are too small get lost. Measure your space and consider how the curves will look in your specific room dimensions.

    What’s Next for Furniture Trends in 2025?

    The curved furniture trend shows no signs of slowing down. If anything, it’s evolving to include new materials and smart technology.

    Future developments will likely include:

    • Smart features: This smart looking furniture with built-in charging stations and technology
    • Eco-friendly materials: Bio-based composites that bend easily while being better for the environment
    • Modular designs: Round-edge furniture that reconfigures for different spaces and needs
    • Mass customization: 3D printing is making personalized curved interior design affordable for regular homeowners.

    The Bottom Line

    Curved furniture isn’t just another design; it is a response to how Americans want to live right now. As our homes serve more functions and our lives get more stressful, the psychological comfort of organic-shaped furniture becomes more valuable.

    The numbers prove it: interior design in furniture is dominated by curves and this trend is only getting stronger. Whether you’re planning a complete redesign or just want to soften your current space, soft-edge furniture offers both style and practical benefits that match how we want to live today.

    The real question isn’t whether curved home decor will keep growing—it’s how soon you’ll experience the comfort and style that only curves can provide.

    Frequently Asked Questions:

    1. What is it about bent furniture that’s becoming so popular in the world of interior design?

    Curved furniture is trending in part because it imparts a sense of flow and softness to rooms — helping spaces feel more welcoming and comfortable.

    It also enhances better circulation of energy, safety and health, as curves represent natural and nurturing shapes.

    2. If I go curved instead of traditional all square furniture, what’s in it for me?

    Curved furniture can offer more efficient space utilization, it also fits better in corners and other angled locations that straight furniture cannot (or will not) go.

    Curves add ambience to social situations – you are around them and they enable more open discussions. It is ergonomic, supportive and it adds a touch of safety especially in homes with children offering a timeless look.

    3. How do I introduce curved furniture into my home without doing a complete overhaul?

    Begin with a statement piece, like a curved sofa or round dining table, then add smaller curved accessories—a mirror or side table —or ottomans.)

    Introducing curves into straight designs adds balance, and decision to place a design should be based on traffic flow as well the size of the room.

    4. Do curved furniture cost more than standard designs?

    Yes, curves in furniture can be more expensive because it’s harder to create smooth, organic shapes than straight lines.

    Prices do fluctuate, and there are budget-friendly options, particularly for accent pieces such as side tables and chairs.

    5. Is furniture in curves a trend that will stand the test of time or is it just a trend?

    Furniture with curves is a classic design trend which is constantly reinvented every decade. Its raw organic beauty is in line with biophilic design values and will remain so for years to come.

  • Soundproof Insulation: Your Key to a Quieter, More Comfortable Home

    Soundproof Insulation: Your Key to a Quieter, More Comfortable Home

    Did you know that noise pollution is a big problem for over 100 million Americans every day? The World Health Organization even says that constant noise causes a huge loss of healthy life years from things like bad sleep, heart problems, and stress. If you’re fed up with hearing your neighbor’s late-night TV or the sound of traffic keeping you awake, soundproof insulation might be the answer you’re looking for.

    Home soundproofing solutions have become really popular as more people realize how much unwanted noise messes with their lives. The right acoustic insulation can change your noisy house into a peaceful sanctuary where you can finally relax and get a good night’s sleep.

    What is Soundproof Insulation, and How Does It Work?

    This special material is made to cut down on noise that travels through your walls or from the outside. Getting the right insulation installed is the key to creating a quiet space.

    Soundproof insulation isn’t like the regular stuff that just keeps your house warm or cool. Its main job is to block, absorb, and reduce the sound waves that create all that unwanted noise. Sound moves through the air and solid things by making vibrations. When those vibrations hit your ears, your brain hears them as sound. Soundproofing materials stop these vibrations in their tracks. They use dense materials that soak up the sound energy and turn it into a tiny, unnoticeable amount of heat.

    The best insulation for noise reduction uses three main tricks: absorption (soaking up sound like a sponge), blocking (putting up a barrier that sounds can’t easily pass through), and decoupling (separating wall layers so vibrations can’t travel across). Different materials are good at different things, so a mix is often best.

    Types of Soundproofing Materials

    Soundproof Insulation: Your Key to a Quieter, More Comfortable Home

    There are several types of materials you can use, and some are better for certain jobs than others. Picking the right one depends on your budget and how much noise you need to block.

    1. Fiberglass Insulation

    You might already have this in your walls for temperature control. Regular fiberglass insulation is also decent for noise insulation for home use. The tiny glass fibers trap air, but they also trap sound waves, which can reduce noise by about 4-10 decibels. It’s a low-cost option that works pretty well in wall cavities and attics.

    1. Mineral Wool (Rockwool)

    This stuff is a step up. Acoustic insulation made from mineral wool is way denser than fiberglass, so it’s much better at blocking sound. It’s made from rock or recycled steel and can cut noise by 10-15 decibels. Contractors often choose mineral wool for serious soundproofing because it’s great at handling both high-pitched and low-rumbling sounds.

    1. Mass Loaded Vinyl (MLV)

    This heavy, flexible vinyl sheet is one of the best insulation materials you can get for blocking sound. Even though it’s super thin (about 1/8 inch), MLV is so dense it can reduce noise by an amazing 20-30 decibels. It’s especially good at stopping low-frequency sounds like traffic or a bass-heavy home theater.

    1. Soundproofing Foam

    Soundproofing foam and fabric panels work a little differently. Instead of blocking noise, they absorb it. This makes them perfect for cutting down on echo and improving the sound quality inside a room. Just know they won’t stop your neighbor’s music from coming through the wall.

    Material TypeNoise ReductionBest ForCost
    Fiberglass4-10 dBBasic soundproofingLow
    Mineral Wool10-15 dBAll-around useMedium
    Mass Loaded Vinyl20-30 dBBlocking transmissionHigh
    Soundproofing FoamVariesEcho controlMedium

    Benefits of Installing Soundproof Insulation

    Soundproof Insulation: Your Key to a Quieter, More Comfortable Home

    It’s not just about peace and quiet; soundproofing has real benefits for your health and wallet. It’s an investment that pays you back in more ways than one.

    1. Better Health and Sleep

    Studies show that being around noise all the time leads to thousands of new cases of heart disease and messes with sleep for millions of people. Soundproof insulation helps protect your family’s health by creating a quieter home. That means better sleep, less stress, and better focus. Kids especially do better in quieter homes—they can concentrate on homework and sleep soundly.

    1. Higher Property Value

    A quiet home is a valuable home. Home soundproofing solutions can also improve your home’s energy efficiency, which means lower utility bills. Real estate agents will tell you that soundproofing is a big selling point, especially in loud, busy neighborhoods. A properly soundproofed home can sell for more than a similar home without it. Buyers today are willing to pay for peace and quiet.

    1. Better Daily Life

    Honestly, living in a quiet space just makes life better. You can have a normal conversation without shouting, watch a movie at a reasonable volume, and work from home without being distracted by every little noise. Noise insulation for home use lets everyone in the family do their own thing without bothering each other.

    Where to Install Soundproof Insulation? 

    To get the most bang for your buck, you need to put insulation in the right places. Sound can sneak through walls, floors, and ceilings, so you need to think about all of them.

    (i) Soundproof Walls

    Creating soundproof walls is the first step for controlling noise between rooms or from outside. Putting acoustic insulation inside wall cavities during construction is the best time to do it. If your walls are already up, you can still add blown-in insulation or hang acoustic panels on the surface to help. For exterior walls, insulation is key to blocking traffic, construction, and loud neighbors.

    (ii) Floors and Ceilings

    Insulation between floors is super important for stopping footstep noise and other impact sounds. Whether it’s kids running around or someone moving furniture, the right materials in the floor and ceiling can make a huge difference for the person downstairs. Ceiling insulation also stops noise from traveling up, which is important in multi-story homes.

    (iii) Insulation for Soundproof Rooms

    Certain rooms need special attention. Insulation for soundproof rooms like home theaters or music studios often requires a mix of different soundproofing materials to get the job done right. Home offices have also become a priority. Soundproofing them means you can take important calls and focus on work without the chaos of the household interrupting you.

    Installation: Professional vs. DIY

    Soundproof Insulation: Your Key to a Quieter, More Comfortable Home

    You have options when it comes to installation, but bigger jobs are usually best left to the pros. Doing it wrong can be a waste of time and money.

    Professional Installation

    For the best results, hire a professional. A good contractor knows which materials work best for your situation and how to install them to maximize their effectiveness. Pros can also spot tricky spots where sound can leak through, like around outlets, pipes, and vents. They have the right tools and experience to do the job right the first time.

    DIY Options

    Some simple projects are fine for DIY. You can easily add soundproofing foam panels to a wall or install door seals and sweeps. But if the job involves tearing down drywall or making big changes, it’s best to call in a professional. If you do it yourself, make sure you wear safety gear and follow the instructions carefully. Common mistakes include leaving gaps or not sealing everything up tight.

    Soundproof Windows and Doors

    Even with the best wall insulation, you can still have a noise problem. Your windows and doors are often the weakest links in your home’s sound barrier.

    Regular single-pane windows and hollow doors let in a surprising amount of noise. Upgrading to double- or triple-pane soundproof windows and doors with laminated glass make a massive difference. For doors, choose a solid-core wood or composite door instead of a hollow one, and make sure it’s sealed properly all the way around. Simple things like weather stripping and door sweeps are cheap, easy upgrades that can really help block noise.

    Maintenance and Long-term Performance

    Good news: quality soundproof insulation is built to last. When installed correctly, materials like mineral wool and fiberglass can last for decades without losing their sound-blocking power. You should just check on it every few years to make sure there’s no moisture damage or pests, as that could hurt its performance. For the most part, it’s a set-it-and-forget-it upgrade.

    Conclusion

    Investing in soundproof insulation is one of the smartest moves you can make for your home and your family. With noise pollution being a real health risk, creating a quiet space makes sense for your well-being and your property value.

    There are all kinds of home soundproofing solutions out there, so you can find an option that fits your budget and your needs. Whether you’re trying to block out noisy neighbors or just create a peaceful room to relax in, the right acoustic insulation can totally change your home for the better. Don’t let noise ruin your life. Start planning your project today and get on the path to a quieter, more comfortable home.

  • Transform Your Space: Easy Do-It-Yourself Projects for a Stylish Home

    Transform Your Space: Easy Do-It-Yourself Projects for a Stylish Home

    DIY home projects are trending in houses all over America. It’s easy to see why. Almost 4 out of 10 people fixing up their homes will spend under $5,000. And for those doing the work themselves, that number jumps to over 6 out of 10. With people spending about 37 hours on their own projects in late 2024, it’s clear that doing it yourself home improvement is becoming the smart choice for budget-conscious families.

    The best part is the savings. DIY projects cost about $2,700 each on average, while the cost of professional projects averages $8,100. That is a savings of over $5,000 for each project. That saved money can be allocated to more improvements or other family priorities. Isn’t it a better deal to save a lot? 

    Why Easy DIY Home Decor Makes Financial Sense

    Realistically, hiring contractors is expensive. With 75% of builders expecting labor shortages to be a challenge this year, those costs are not expected to decrease soon.

    Here’s what the numbers show about affordable DIY home ideas:

    • DIY home projects can save up to 83 percent compared to a contractor’s job. These are significant savings that accumulate quickly.
    • Data from the Home Improvement Research Institute (HIRI) indicates that in 2023, 52% of homeowners spent under $500 on home improvement projects, 19% spent between $500 and $999, and 17% spent between $1,000 and $4,999. 
    • The do it yourself home improvement market reached USD 0.88 trillion in 2024, indicating that millions of Americans are choosing the DIY route for their home upgrades.

    How Much Does DIY Home Decor Cost

    The DIY home decor costs will not be much, as you can do it at a minimal cost. The general cost of some basics is mentioned below. 

    • Paint projects: $50-300 per room
    • Furniture makeovers: $25-150 per piece
    • Lighting updates: $100-500 per room
    • Storage solutions: $75-400 per project

    Essential Tools for Simple DIY Home Upgrades

    Transform Your Space: Easy Do-It-Yourself Projects for a Stylish Home

    Before you start on any DIY room makeover ideas, you need some basic tools. Don’t worry, you don’t need a giant workshop to get started.

    Your Basic Tool Kit:

    • Cordless drill with bits ($60-120)
    • Level (a 2-foot and a 4-foot one are great) ($25-45)
    • Measuring tape, 25-foot ($15-25)
    • Hammer set ($20-35)
    • Screwdriver set ($15-30)
    • Safety glasses and gloves ($10-20)

    Smart Shopping Tip: Don’t buy everything at once. Buy tools as you need them for a project. Start with these basics and then add other tools when you need them. It’s better to buy one good tool than a bunch of cheap ones. A good drill can last you more than 10 years.

    DIY Wall Decor Ideas That Transform Rooms

    Walls offer the biggest opportunity for impact. Home decor DIY projects that focus on walls give you the most visual change for your investment.

    Painting Made Simple

    • Accent Walls: Just pick one wall in a room and paint it a bold color. This costs 75% less than painting the whole room but still gives you that wow factor.

    How to Prep for Paint:

    1. First, wash your walls with a little bit of soap and water.
    2. Fill in any nail holes with spackling paste.
    3. Sand any rough spots so they’re smooth.
    4. If you’re painting over a dark color, use a coat of primer first.

    Easy Painting Tricks:

    • Use painter’s tape to get super clean, straight lines.
    • Use a roller for the big areas and a brush for the edges.
    • Do a few thin coats of paint instead of one thick, gloppy one.
    • Pull off the painter’s tape when the paint is still a little wet.

    Other Cool Wall Ideas

    • Removable Wallpaper: This is a game-changer. Peel-and-stick wallpaper costs about $30-80 for a room and comes right off when you’re tired of it. It’s perfect if you rent or just like to change your style.
    • Wood Accent Walls: Shiplap or reclaimed wood gives you that popular farmhouse look. You can buy the wood for $3-8 per square foot at a home store. Or check out salvage yards for even cheaper finds.
    • Gallery Walls: Mix your family photos with cool art prints and other small decor. A great trick is to cut out paper shapes the size of your frames. Tape the paper to the wall first to figure out your layout before you start making holes.

    DIY Furniture Makeover Projects

    Transform Your Space: Easy Do-It-Yourself Projects for a Stylish Home

    Many stylish home DIY projects are all about updating old furniture. You can change the whole feel of a room just by giving a few key pieces a new look, instead of buying new stuff.

    Painting Furniture the Right Way

    • Prep is Everything: You have to sand the piece just a little bit to get rid of the shiny finish. This helps the paint stick. Then, clean it with a degreaser, especially if it’s a kitchen piece that gets greasy.
    • Best Paints for the Job:
      • Chalk paint: Super easy to use; you barely have to prep the surface.
      • Latex paint: The most affordable choice and very tough.
      • Milk paint: A natural paint that gives a cool, unique texture.

    Tips for a Great Finish:

    • Use good quality brushes. They help you avoid ugly streak marks.
    • Do 2 or 3 thin coats of paint. It looks way better than one thick coat.
    • Lightly sand between coats for a super smooth finish.

    Update the Hardware

    Changing out cabinet knobs and drawer pulls can make a piece of furniture look brand new, and it only costs about $50-200. Try to match the metals in your room. Brushed gold gives a warm look, while matte black feels more modern.
    Easy Installation: Measure the old holes before you buy new hardware. If you’re switching to a different style, you can use wood filler to hide the old holes.

    Lighting Solutions for Every Budget

    Simple DIY home upgrades for your lighting can make a room feel way more expensive and comfortable. Good lighting can even trick the eye and make a space feel bigger.

    Easy Lighting Projects to Try

    • Under-Cabinet Kitchen Lights: You can get LED strip lights for $20-50. They just plug into a regular outlet. Pick a warm white light for a cozy feel or a bright white light for when you’re cooking.
    • Swap Out Pendant Lights: Get rid of that boring ceiling light and put in a stylish pendant light. Just make sure the electrical box in the ceiling can hold the weight. And always, always turn off the power at the breaker box first.
    • Lamp Makeovers: Give an old lamp a facelift with a new shade, paint the base, or even rewire a cool vintage lamp you found. You only need wire strippers and electrical tape for basic wiring.

    Storage Solutions That Look Good

    Transform Your Space: Easy Do-It-Yourself Projects for a Stylish Home

    Home decor DIY projects that add storage are great because they fix two problems: clutter and style. Building your own storage costs so much less than buying it.

    Built-In Storage Ideas

    • Floating Shelves: Use heavy-duty brackets that can hold the weight of what you plan to put on them. Always screw them into the wall studs so they’re safe, especially in a kitchen or bathroom.
    • Window Seat with Storage: If you have an unused spot under a window, build a simple box frame with a hinged top. Add a cushion, and you have a new seat with hidden storage.
    • Closet Upgrades: You can double your closet space by adding a second rod. Add shelf dividers and use special hangers. These small changes can make a huge difference.

    Outdoor DIY Home Projects

    Your outdoor space is like another room for your house. The outdoor spaces extend your living area and can add property value. Focus on projects that are suitable for your climate and create comfort.

    • Deck and Patio Fixes: Bring a weathered deck back to life by power washing it first. Let it dry completely, then put on a quality stain in thin coats. For patios, you can create a seating area with pavers or decorative stones.
    • Garden Projects: Build some raised garden beds with cedar or composite wood. Make them no more than 4 feet wide so you can reach the middle. You can also make nice garden paths with stepping stones or gravel.

    Planning Your DIY Room Makeover Ideas

    Transform Your Space: Easy Do-It-Yourself Projects for a Stylish Home

    The secret to a great project is planning. Over 60% of homeowners went the DIY route in 2024 because it saves so much money.

    How to Prioritize Your Projects

    • Start Small: Begin with projects that have a big impact but a low cost. Things like paint, new hardware, and lighting can change a room for under $500.
    • Think About the Season: Plan your outdoor projects for when the weather is good. You can do indoor projects anytime, but remember to open windows for ventilation if you’re painting.
    • Build Your Skills: Start with easy projects to build your confidence. Every project you finish teaches you something new.

    Managing Your Budget

    • Track Everything: Keep a list of everything you spend, down to the last screw. This helps you plan for future projects.
    • Have a 20% Buffer: Trust us on this. Unexpected things always come up. Having a little extra cash set aside means you won’t have to stop in the middle of a project.
    • Be Smart About Tools: Buy good tools you’ll use a lot. For special tools you’ll only use once, just rent them.

    How to Transform Your Space?

    Affordable DIY home ideas are about more than saving money; they are about creating a space that truly reflects your personal style. With a strategic approach, you can achieve professional-looking results for a fraction of contractor costs.

    The key to successful, stylish home DIY projects is starting small, building skills step by step, and focusing on changes that make the biggest visual impact first. Whether you are updating one room or your whole house, combining good planning with quality materials and patience will give you results that improve both your daily living and your property’s value. These easy DIY home decor projects prove that anyone can transform their space.

  • Kitchen Makeover Guide: Design, Decor, and Function

    Kitchen Makeover Guide: Design, Decor, and Function

    Are you thinking about redoing your kitchen? Well, it is one of the smartest investment you can make at this time. Remodeling Magazine says homeowners usually get back 65-75% of what they spend on a kitchen remodel when they sell. That’s a pretty good deal. But not all kitchen renovation tips are the same. The key is to find the right mix of good looks and real-world usefulness.

    Your kitchen isn’t just a place to cook anymore. It’s the hub of the house. It’s where you have your morning coffee, where the kids do homework, and where everyone gathers. This guide covers the kitchen design ideas that really work, whether you’re tearing everything out or just trying to freshen things up.

    Planning Your Kitchen Makeover: Getting Started Right

    Before you start picking out fancy countertops, you have to plan. Good kitchen renovation always starts with a solid plan. This is the part that keeps your project on budget and stops it from turning into a mess.

    Setting Your Budget and Timeline

    A smart budget is the most important part of any kitchen project. Minor kitchen updates can give you a huge return on investment, around 96% in 2024. They’re one of the best home improvements you can do.

    Here’s a simple breakdown of where your money should go:

    • Cabinets and Hardware: 35-40% of your budget
    • Labor: 20-25% of your budget
    • Appliances: 15-20% of your budget
    • Countertops: 10-15% of your budget
    • Flooring: 7-10% of your budget
    • Lighting: 5% of your budget
    • Paint and extras: 5% of your budget

    Most people think renovations are way faster than they really are. A small kitchen makeover might take 3-5 weeks. A big one can easily take 8-12 weeks, sometimes more. And don’t forget to plan for delays from custom orders or waiting for city permits.

    Looking at Your Current Kitchen Layout

    Your current kitchen layout design has a huge impact on cost and how well your kitchen actually works. The “work triangle,” the path between your sink, stove, and fridge, should be between 12 and 26 feet total. Figure out what’s working for you now and what’s driving you crazy before you change anything.

    Kitchen Design Ideas That Actually Work

    Kitchen Makeover Guide: Design, Decor, and Function

    Good modern kitchen design is more than just making something look pretty for a picture. It’s about creating a space that fits how you live, looks great, and holds its value.

    Choosing the Right Layout

    The kitchen layout design is the base for everything else. Each layout has its pros and cons:

    • L-Shaped Kitchens: Perfect for corner spaces and open-concept homes. They create a natural workflow and often have room for an island.
    • Galley Kitchens: These work great in long, narrow rooms. With two parallel counters, they’re super efficient for cooking, but they can feel a bit tight if not planned well.
    • U-Shaped Kitchens: These give you the most counter space and storage. If you’re a serious cook, this is for you. But you need a wide enough room so it doesn’t feel cramped.
    • Island Kitchens: An island adds a ton of workspace and a spot for people to sit. Just make sure you have at least 42 inches of clear space all around it so people can walk by.

    Kitchen Paint Colors That Look Good

    The kitchen paint colors you choose will set the entire vibe of the room. Super white and all-gray kitchens are starting to feel a little dated. The trend for 2025 is all about warmer, earthy colors like greens and browns.

    Popular Colors for 2025:

    • Earth Tones: Think olive green, moss, and sage. These colors are popping up everywhere. They feel calm and look awesome with natural wood and stone.
    • Warm Neutrals: You can’t go wrong with off-white, cream, or a light warm gray. They make a space feel bigger and brighter.
    • Bold Colors: A deep navy blue, rich burgundy, or dark charcoal gray can look amazing on a kitchen island or as an accent wall.

    Try the 60-30-10 rule: 60% of the room is your main color (walls), 30% is a secondary color (cabinets), and 10% is an accent color (hardware, decor).

    Cabinets, Countertops, and Storage Solutions

    Kitchen Makeover Guide: Design, Decor, and Function

    These are the workhorses of your kitchen. They make up a big chunk of your budget, so you want to choose them carefully to get a functional kitchen design.

    Smart Cabinet Choices

    Kitchen cabinets are your biggest expense and the first thing people see. Good-quality cabinets can last over 20 years, but cheap ones can start to look beat up in just 5.

    Best Kitchen Storage Solutions:

    • Pull-Out Drawers: Putting these in your lower cabinets is a game-changer. No more getting on your hands and knees to find a pot in the back.
    • Lazy Susans: These are great for making corner cabinets useful. You can store so much more stuff in there.
    • Drawer Dividers: A simple way to keep your utensils and tools organized.
    • Deep Drawers: These are much better than shelves for storing heavy things like a stand mixer or big pots and pans.

    Countertop Options

    Countertops need to be tough, look good, and be easy to clean.

    • Quartz: This stuff is a beast. It doesn’t stain or scratch easily, and you barely have to do any maintenance. But be careful with hot pans, as high heat can damage it.
    • Granite: Every piece is unique, and it handles heat well. You just have to remember to seal it every couple of years to keep it from staining.
    • Butcher Block: Wood countertops look warm and inviting. They’re great for chopping on, but they need to be oiled, and you have to clean up spills right away.

    Modern Kitchen Design: Appliances and Tech

    Smart appliance choices can totally change your cooking experience. Look for energy savings and features you will actually use.

    Must-Have Appliance Updates

    Energy-efficient appliances will save you money on your utility bills, and they just work better. Look for the ENERGY STAR label and read reviews from real people.

    Refrigerator Tips:

    • Measure your space first! A standard 36-inch-wide fridge fits in most kitchens.
    • Counter-depth models sit flush with your cabinets and look more high-end.
    • French door models make it easy to see and grab fresh food.

    Cooking Options:

    • Gas stoves give you instant heat control and still work if the power goes out.
    • Electric induction cooktops heat up even faster than gas.
    • Combination ranges give you the best of both worlds: a gas cooktop with an electric oven.

    Lighting and Making It Look Good

    Kitchen Makeover Guide: Design, Decor, and Function

    Good kitchen lighting is about safety, setting a mood, and showing off your design. You need different types of light to do it right.

    • Task Lighting: This is a bright light right where you’re working. Under-cabinet LED strips are a must-have for lighting up your counters.
    • General Lighting: This lights up the whole room. Recessed ceiling lights or a nice ceiling fixture make the space feel bright and welcoming.
    • Accent Lighting: This is the fun stuff. Lights inside glass cabinets can show off your nice dishes, and a cool decorative light can be a centerpiece.

    Kitchen Decor Ideas That Work

    Your kitchen decor ideas are what turn a workspace into a space with personality.

    Backsplash and Wall Ideas

    A kitchen backsplash protects your walls from splashes and adds a ton of style. It’s one of the easiest and cheapest kitchen remodeling ideas for a new look.

    • Subway Tiles: They’re a classic for a reason. Try using a colored grout to make them more interesting.
    • Big Tiles: Larger format tiles look modern and mean fewer grout lines to clean.
    • Natural Stone: Adds a great texture and high-end feel.

    Hardware and Fixtures

    Cabinet knobs, pulls, and your faucet are like jewelry for your kitchen. These small details make a big impact.

    • Try to match the finish of your hardware with your faucet and lights.
    • Longer pulls look better on big drawers.
    • It’s okay to mix knobs and pulls, but keep the style and finish similar.

    Small Kitchen Makeover Ideas

    Even a small kitchen makeover can feel huge if you focus on the right things.

    Storage in Small Spaces

    Good kitchen storage solutions are extra important when you don’t have a lot of room.

    • Use your vertical space. Get cabinets that go all the way to the ceiling.
    • Add small shelves to the inside of cabinet doors.
    • A rolling cart can give you extra counter space when you need it and can be moved out of the way.

    Making Small Kitchens Feel Bigger

    Light colors are your friend. They bounce light around and make a room feel more open. A mirrored or glass backsplash can also help. And the number one rule: keep your counters as clear as possible.

    How to Get a Perfect Kitchen Makeover?

    A great kitchen makeover is all about balance. Good kitchen remodeling ideas add real value to your home—anywhere from $26,000 to over $60,000. It’s an upgrade for your lifestyle and a smart investment.

    Start with a solid foundation: a good layout, quality cabinets, and durable countertops. Then, add your own style with decor that you can always change later. Your kitchen should work for you. If you don’t bake, don’t waste money on a double oven. If you entertain a lot, focus on seating.

    A successful makeover solves the real problems you have with your current kitchen, all while creating a space you’ll love being in for years to come.

  • Renovate Your Bathroom? Here’s the Best Way to Get It Done

    Renovate Your Bathroom? Here’s the Best Way to Get It Done

    The global house renovation market size jumped from 1,994.02 billion in 2024 to 2,049.25 billion in 2025, with bathroom renovation being one of the top home improvement projects. The problem is that most homeowners jump into their bathroom makeover without proper planning, which leads to budget overruns and endless delays.

    If you’re thinking about a new bathroom or want to upgrade your existing space, this guide will show you exactly how to get it done right. We’ll cover everything from budget bathroom renovation ideas to modern bathroom renovation trends that actually work.

    Understanding Real Bathroom Renovation Costs

    Before you start tearing things apart, you need to know what you’re getting into financially. A typical midrange bathroom remodel recoups about 58.9% of your investment when you sell your home, making it a smart move if done correctly.

    Recent data shows some eye-opening numbers. For small bathroom renovation projects, costs rose by 20% year over year, going from $5,000 to $6,000. If you’re planning something bigger, expect to spend anywhere between $10,000 and $40,000 for a complete bathroom makeover.

    What Actually Affects Your Budget

    Different homeowners spend different amounts based on their needs and goals. Gen Xers and baby boomers typically spend around $15,000 on their bathroom renovation projects, while younger folks often look for more affordable options.

    Here’s what really impacts your final bill:

    • Size of your space: Small bathroom floors cost between $2,500 and $6,000, while full bathrooms range from $3,500 to $16,000.
    • How much you’re changing: Minor updates vs complete gut jobs
    • Materials you pick: Basic fixtures vs. high-end finishes
    • Who does the work: DIY vs hiring professionals

    Always add 20% to whatever budget you think you need. Trust us on this one; unexpected problems always show up.

    Planning Your Bathroom Remodel Timeline

    Renovate Your Bathroom? Here’s the Best Way to Get It Done

    Poor planning kills more bathroom renovation projects than anything else. Every job is different, but having a solid timeline keeps everything moving smoothly and prevents costly delays.

    Getting Started Right (Weeks 1-2)

    Don’t jump straight into demo mode. The first step in any successful bathroom renovation is proper planning. You need to figure out what you actually want before you start ripping things out.

    During this phase:

    • Measure everything twice and create a basic floor plan
    • Check what permits you need (most areas require them for electrical and plumbing).
    • Get quotes from at least 3 contractors if you’re hiring help.
    • Order special items that take forever to arrive

    Design and Permits (Weeks 3-4)

    Bathroom interior design isn’t just about making things look pretty; it’s about creating a space that actually works for your daily routine. This phase prevents expensive mistakes later when you realize you forgot something important.

    Focus on these key decisions:

    • Where fixtures will go and what plumbing changes you need
    • Electrical requirements for lighting, outlets, and ventilation
    • Storage solutions that make sense for your space
    • Whether you need to think about accessibility features

    DIY vs. Professional Help: What Makes Sense

    About 9 out of 10 people doing bathroom renovation projects use professionals for at least part of the work. But smart homeowners know which jobs they can handle themselves to save money.

    When You Need Professional Help

    Some jobs just aren’t worth the risk of doing yourself. These always need pros:

    • Moving plumbing: Relocating pipes, drains, or major fixtures
    • Electrical work: New circuits, outlets, or upgrading electrical panels
    • Structural changes: Taking out walls or changing the basic layout
    • Waterproofing: This stuff is critical; mess it up and you’ll have major problems.

    DIY Jobs That Save Real Money

    If you’re handy and have time, these bathroom upgrade ideas can cut your costs significantly:

    • Painting walls and doing trim work
    • Installing towel bars, mirrors, and accessories
    • Basic tile work (if you take time to learn proper techniques)
    • Tearing out old stuff (non-structural demolition)

    Just remember, it takes longer than you think. Don’t rush it, or you’ll end up with sloppy results.

    The Step-by-Step Renovation Process

    Renovate Your Bathroom? Here’s the Best Way to Get It Done

    Every successful bathroom renovation follows a logical order. You can’t just start wherever you feel like it; there’s a sequence that prevents problems and keeps things moving efficiently.

    Phase 1: Demo and Prep

    Protect the rest of your house first. Bathroom demo creates tons of dust and debris that gets everywhere. Remove things in this order:

    • Mirrors, towel bars, and accessories
    • Vanity and countertops
    • Toilet and other plumbing fixtures
    • Old flooring
    • Wall tiles or wallpaper (if you’re replacing them)

    Phase 2: Behind-the-Walls Work

    This is where all the important stuff happens that nobody sees. Get all your plumbing, electrical, and HVAC work done before you close up the walls. Install:

    • New plumbing lines and drain connections
    • Electrical circuits for lights, outlets, and fans
    • Ventilation fan ducting
    • Any framing repairs or reinforcements

    Phase 3: Drywall and Prep

    Proper insulation prevents moisture problems and keeps your new bathroom comfortable. After insulation goes in, hang and finish drywall. Make sure everything is smooth before moving to the next step.

    Phase 4: Flooring

    Install flooring before putting in fixtures; it makes waterproofing around the toilet and tub much easier. Popular modern bathroom renovation flooring options include:

    • Porcelain tile (durable and water-resistant)
    • Luxury vinyl plank (budget-friendly and easy to install)
    • Natural stone (expensive but looks amazing)

    Common Mistakes While Renovating Your Bathroom 

    Learning from other people’s mistakes saves you both time and cash. About half of homeowners who did a bathroom makeover said they started the project because they couldn’t stand their old bathroom anymore, but rushing leads to regrets.

    Budget Problems That Kill Projects

    The biggest mistake? Not planning for the unexpected. Here’s what catches people off guard:

    • Hidden damage: Water damage behind walls that you can’t see until demo
    • Code updates: Bringing old electrical or plumbing up to current standards
    • Changing your mind: Deciding to upgrade fixtures halfway through
    • Storage problems: Not planning enough storage space

    Design Choices You’ll Regret Later

    Best bathroom renovation tips always include thinking long-term. Some common regrets include:

    • Picking trendy styles that’ll look dated in 5 years
    • Skipping proper ventilation to save money
    • Not installing enough lighting
    • Ignoring accessibility needs (even if you don’t need them now)

    Getting the Most Value from Your Investment

    Smart bathroom renovation planning considers resale value from day one. A midrange bathroom remodel typically recoups 60-70% of what you spend, making it one of the better home improvement investments.

    Features That Actually Add Value

    Put your money into these high-impact bathroom remodel ideas:

    • Updated fixtures: Modern faucets, showerheads, and hardware
    • Better lighting: Good lighting makes any space feel more expensive.
    • Quality flooring: Durable materials that handle moisture well
    • Smart storage: Built-in solutions that maximize your space

    Affordable Upgrades That Look Expensive

    You don’t need to blow your budget to create a high-end feel with these bathroom upgrade ideas:

    • Crown molding and nice trim work
    • High-quality paint in sophisticated colors
    • Statement mirrors and upgraded hardware
    • Good accessories and maybe a plant or two

    Timeline Reality Check

    Small bathroom renovation projects typically take 2-3 weeks for minor updates. Mid-range remodels usually need 4-6 weeks. Complete bathroom renovations often take 8-12 weeks, and luxury custom projects can stretch 3-6 months.

    Create a realistic schedule with extra time built in. Order materials early, stay in touch with your contractors, and be ready to make decisions quickly when problems come up.

    Final Thoughts on Your Bathroom Project

    A successful bathroom renovation comes down to three things: good planning, realistic budgeting, and quality work. Whether you’re doing a simple refresh or creating a completely new bathroom, following these guidelines helps you avoid the problems that mess up so many projects.

    The bathroom makeover you’ve been thinking about is totally doable if you approach it right. Take time to plan everything upfront, set a realistic budget, and don’t rush the important stuff. You’ll end up with a space that works great for your family and adds real value to your home.

    Your daily routine deserves a bathroom that actually works well. Do it right the first time, and you’ll enjoy the results for years to come.

  • Stunning Gallery Wall Layouts to Match Every Room and Aesthetic

    Stunning Gallery Wall Layouts to Match Every Room and Aesthetic

    Blank walls are everywhere in American homes. Those empty spaces above sofas, beds, and dining tables that somehow never get decorated. Most homeowners buy art with good intentions but then struggle with the actual hanging part. You know the scene: frames leaning against walls for months, waiting for someone to figure out the “right” way to arrange them.

    This hesitation makes sense when you consider the numbers. Americans spent over $603.60 billion on home remodeling in 2024, yet surveys show that more than half of homeowners feel overwhelmed when it comes to wall decor ideas. The global wall art market hit $48.02 billion in 2023 and keeps growing at 5.8% each year, proving people want to decorate their walls; they just need to know how.

    Creating stunning gallery wall layouts and picture wall ideas doesn’t have to be complicated. With some basic planning and the right approach, anyone can transform boring blank walls into personal art displays that actually look intentional.

    Why Gallery Walls Matter More Than Ever

    Gallery wall layouts have become the go-to solution for boring blank walls across America. Instead of buying one expensive large piece, homeowners can mix different sizes and styles and even add personal photos to create something unique.

    This trend isn’t going anywhere; interior designers report that 68% of clients now ask for art wall ideas during consultations. The best part about wall art arrangements is they work in every room and with any budget. You can start small with just three pieces and grow your collection over time.

    Unlike wallpaper design that requires major commitment, gallery walls can change as your taste evolves. This flexibility makes them perfect for renters and homeowners alike, since you can take your collection with you when you move.

    Plus, mixing personal photos with purchased art creates displays that actually tell your story rather than just filling empty space.

    Basic Rules That Actually Work

    Getting your frame wall layout right comes down to three simple rules that professional designers use:

    • The 2-3 Inch Rule: Keep consistent spacing between all pieces. This prevents your wall from looking messy or crowded. Most people hang things too close together, which makes even beautiful art look cheap.
    • Eye Level Hanging: The center of your main piece should be 57-60 inches from the floor. For wall art for living room spaces where people sit most of the time, adjust this to seated eye level instead.
    • Template Testing: Cut paper templates the same size as your frames and tape them to the wall first. This saves you from making holes in the wrong spots and lets you try different arrangements easily.

    Room-by-Room Gallery Wall Strategies

    Stunning Gallery Wall Layouts to Match Every Room and Aesthetic

    Different rooms call for different approaches when it comes to wall decor ideas. Your living room can handle bold, large-scale arrangements, while bedrooms work better with calmer, more personal displays.

    The key is matching your picture wall ideas to how each space gets used and what mood you want to create. Understanding these room-specific needs helps you choose the right pieces and avoid common mistakes like hanging family photos in formal dining rooms or busy abstract art in relaxing bedrooms.

    Living Room: The Main Event

    Your living room offers the biggest opportunity for wall decor ideas that make a real impact. American homeowners reported spending an average of $18,000 on renovations recently, with living room updates being the top priority.

    Above the Sofa Setup: This is the most popular spot for wall art for living room displays. Start with your largest piece as the anchor, then add smaller pieces around it. The total width should be about 2/3 the width of your sofa – so if your couch is 90 inches wide, aim for around 60 inches of wall art.

    Easy Gallery Wall Layout with Sizes: Here’s a simple formula that works every time:

    • One large piece (24×36 inches) in the center
    • Two medium pieces (16×20 inches) on the sides
    • Three to four small pieces (8×10 or 11×14 inches) to fill gaps
    • Keep 2-3 inches between all frames

    Color Matching Made Simple: Pick artwork that uses 2-3 colors already in your room. This creates harmony without being boring. If your living room is mostly neutral, you can go bolder with your art choices.

    Bedroom: Personal and Peaceful

    Bedroom picture wall ideas should feel calming and personal. The space above your bed is prime real estate, but don’t ignore other walls.

    • Headboard Gallery: Create a horizontal arrangement that extends about 6 inches beyond each side of your headboard. Mix personal photos with art prints, but keep the overall vibe relaxing. Avoid anything too bright or busy since this is where you sleep.
    • Dresser Wall Display: The wall above your dresser works great for smaller art wall ideas. Use pieces under 16 inches wide so they don’t overwhelm the furniture. This spot is perfect for family photos mixed with small paintings or prints.
    • Corner Solutions: Turn unused corners into cozy gallery spots using floating shelves. Layer small frames with plants or decorative objects for depth.

    Kitchen and Dining Areas: Functional Art

    Kitchen wall decor ideas need to handle heat, humidity, and cooking smells. 52% of homeowners planning kitchen updates in 2025 want textured walls, making art selection even more important.

    • Breakfast Nook Gallery: Small spaces work great for intimate picture wall ideas. Food photography, coffee prints, or botanical art fit perfectly. Always use glass frames to protect from cooking moisture.
    • Open Shelving Mix: Combine floating shelves with small framed pieces. Alternate cookbooks with art and add some plants for a natural touch. This creates functional storage plus visual interest.

    Style-Based Layout Approaches

    Stunning Gallery Wall Layouts to Match Every Room and Aesthetic

    Your personal style should drive your gallery wall layout choices, not the other way around. Whether you love clean minimalist looks or prefer eclectic, collected-over-time vibes, there’s a frame wall layout approach that’ll work for you.

    The trick is staying consistent within whatever style you choose – mixing minimalist grids with bohemian clusters usually looks confused rather than creative. Once you nail down your preferred aesthetic, creating cohesive art wall ideas becomes much easier.

    1. Modern and Clean

    Minimalist gallery wall layouts are hugely popular right now. 63% of consumers prefer minimalist designs, making clean arrangements a safe bet for most homes.

    • Perfect Grid Method: Use identical or very similar frame sizes arranged in neat rows. This works especially well with black and white photography or abstract prints. The key is keeping everything perfectly aligned – use a level and measure carefully.
    • Single Row Linear: Hang 3-5 pieces in one straight horizontal line with identical spacing. This frame wall layout works great in hallways or above long furniture like console tables or beds.

    2. Eclectic and Fun

    Bohemian wall art arrangements let you mix different styles, colors, and frame types. This approach celebrates individuality and works well for creative personalities.

    • Salon Style Clustering: Overlap frames slightly and vary hanging heights to create that collected-over-time look. Include tapestries, mirrors, or even small shelves alongside traditional framed art.
    • Organic Shape Flow: Forget straight lines completely. Cluster pieces based on how they look together rather than geometric rules. This style works great with mixed media collections.

    3. Traditional and Formal

    Classic symmetrical displays never go out of style, especially in formal dining rooms or home offices.

    • Anchor Piece Strategy: Start with one large central piece, then build matching arrangements on both sides. This gives structure while still allowing creativity.
    • Portrait Gallery Style: Perfect for hallways or stairwells. Arrange family photos or formal artwork in descending size order for an elegant corridor display.

    Planning Your Gallery Wall Project

    Stunning Gallery Wall Layouts to Match Every Room and Aesthetic

    Before you start putting holes in walls, spend time planning your easy gallery wall layout with sizes. This planning phase is where most people mess up – they get excited and start hanging things without thinking through the bigger picture.

    Smart planning prevents expensive mistakes and saves you from having to patch nail holes later. Taking measurements, considering your existing furniture, and thinking about lighting all happen before you buy your first piece of art.

    Getting Started

    Before buying anything, figure out your wall dimensions and how much you want to spend. Most successful easy gallery wall layouts start with 3-5 pieces and grow from there.

    • Floor Planning First: Arrange everything on the floor with proper spacing before touching the wall. Take photos from different angles to see how it looks. This step prevents expensive mistakes.
    • Lighting Matters: Position your gallery wall away from direct sunlight that can fade artwork. The wall art market is expected to hit $101.3 billion by 2032, partly because people are investing in better quality pieces worth protecting.

    Common Mistakes to Avoid 

    • Hanging Too High: Most people hang art way too high. Remember the 57-60 inch rule for the center of your main piece.
    • Ignoring Furniture Size: Your wall art arrangement should relate to nearby furniture. A tiny gallery wall above a large sofa looks lost, while an oversized display above a small chair feels overwhelming.
    • Mixing Cheap and Expensive Frames: While different frame styles can work together, make sure they’re all decent quality. Cheap plastic frames next to nice wood ones look obviously mismatched.
    • Not Planning for Growth: Leave some space to add pieces later. The best gallery walls evolve over time as you find new art you love.

    Making It Work Long-Term

    Stunning Gallery Wall Layouts to Match Every Room and Aesthetic

    Your gallery wall layout should grow and change with you. Use picture ledges for some pieces so you can easily swap things out seasonally without making new holes.

    Clean your frames monthly with a microfiber cloth, and consider UV-protective glass for valuable pieces. Document your arrangements with photos before making changes – this helps when you want to recreate successful combinations.

    The most important thing about wall decor ideas is choosing pieces you actually like looking at every day. Whether you prefer clean minimalist grids or eclectic mix-and-match styles, your gallery wall should make you happy each time you see it.

    Start with just a few pieces and build slowly. The perfect picture wall ideas aren’t created overnight – they develop over time as you discover what works in your space and reflects your personality. Don’t stress about making it perfect right away; focus on creating something that feels like home.

  • How to Navigate Smart Technology: Clear Step-by-Step Guides

    How to Navigate Smart Technology: Clear Step-by-Step Guides

    Have you bought any new smart technology and found yourself in trouble, surrounded by instruction manuals, and seriously considering returning the device? According to recent research, consumers spend close to 1.5 hours of their own time resolving smart device issues and one hour working with customer service.

    Even after so much talk about tech and smart technology, even now, an average American spends around 1-2 hours per week dealing with smart home maintenance or support issues. The smart home market is booming, with revenue expected to hit $174 billion by 2025, but many people still find themselves lost when it comes to actually using these devices.

    Smart technology doesn’t have to be complicated. With 69.91 million US households now using smart home devices, a 10.2% jump from last year, it’s clear that once people figure it out, they love the convenience. The key is knowing the right steps to take and avoiding common mistakes that trip up most beginners.

    Understanding Smart Technology Basics

    Smart technology means devices that connect to the internet and can talk to each other or be controlled remotely. These IoT (Internet of Things) devices include everything from thermostats and light bulbs to security cameras and door locks.

    The biggest difference between regular devices and smart devices is connectivity. A regular light switch just turns lights on and off. A smart home device can do that, plus let you control it from your phone, set schedules, and even respond to voice commands.

    Most home automation systems work through three main parts: your home’s WiFi network, the devices themselves, and an app or voice assistant to control everything. Understanding this basic setup helps prevent the confusion that causes 38% of people to return their first smart device within 30 days.

    Pre-Setup Planning for Smart Homes

    Before buying any smart home devices, check your internet speed. Most devices need at least 10 Mbps upload speed to work properly. You can test this for free using speed test websites. If your internet is slow, adding multiple devices will make everything run poorly.

    Next, decide which room to start with. The living room is usually best because it has good WiFi coverage and you spend lots of time there. Starting small with 2-3 devices helps you learn without getting overwhelmed.

    Smart home devices that work together are much better than random devices from different brands. Popular ecosystems include:

    • Amazon Alexa: Works with over 100,000 devices
    • Google Home: Good integration with Android phones
    • Apple HomeKit: Best if you use iPhones and iPads
    • SmartThings: Works with almost everything

    Choose one ecosystem and stick with it. This makes setting up a smart home much easier because everything uses the same app.

    Step-by-Step Device Setup Process

    How to Navigate Smart Technology: Clear Step-by-Step Guides

    Getting Your Network Ready

    Strong WiFi is crucial for home automation. Most routers that come from internet companies are okay for basic use, but smart home devices need a consistent connection. If your WiFi is weak in some rooms, consider getting a mesh network system.

    Create a separate network for your IoT devices if possible. Many newer routers have a “guest network” feature; use this for smart devices. This keeps your main devices (like computers and phones) separate and more secure.

    Installing Your First Smart Device

    Start with something simple, like a smart plug or smart bulb. These are cheap (usually under $15) and hard to mess up. Here’s the basic process that works for most devices:

    1. Download the app first.
    2. Create your account in the app
    3. Plug in or install the device
    4. Put the device in pairing mode (usually by holding a button for 3-5 seconds).
    5. Follow the app instructions to connect to WiFi.
    6. Test the basic functions before moving on

    This process takes 10-15 minutes for most devices. If it’s taking longer, something’s wrong; check your WiFi password or restart your router.

    Connecting Multiple Devices

    Once your first device works, adding more becomes easier. The app will remember your WiFi settings, so new devices connect faster. However, don’t add everything at once. Add 1-2 devices per week so you can learn how each one works.

    Group similar devices together in your app. Put all bedroom lights in a “Bedroom” group, all kitchen devices in a “Kitchen” group, etc. This makes controlling multiple devices much simpler.

    Common Setup Problems and Solutions

    The common setup problem for any smart technology is with its connectivity. The WiFi connection issues cause about 60% of setup problems. If a device won’t connect:

    • Move closer to your router during setup.
    • Make sure you’re using the 2.4 GHz network (not 5 GHz).
    • Double-check your WiFi password.
    • Restart your router if needed.

    App crashes happen when phones don’t have enough storage or the app is outdated. Delete old photos or apps you don’t use, then update the smart device app.

    Device not responding usually means the device lost its WiFi connection. Unplug it for 10 seconds, then plug it back in. Most devices will reconnect automatically.

    Some devices just don’t work well together, even if they claim to be compatible. Research shows that devices from the same brand work together 85% better than mixing different brands.

    Smart Home Automation Setup

    How to Navigate Smart Technology: Clear Step-by-Step Guides

    How to automate your home starts with simple routines. Instead of manually controlling each device, create automatic actions based on time or triggers.

    Popular automation ideas include:

    • Turn on porch lights at sunset
    • Lower thermostat at bedtime
    • Start coffee maker at 7 AM
    • Lock doors at 11 PM

    Most smart home guide resources suggest starting with time-based automations since they’re easier to set up. Motion sensors and other trigger-based automations can come later once you’re comfortable with the basics.

    The key to good automation is keeping it simple. Complex rules with multiple conditions often break or behave unexpectedly. Stick to straightforward “if this, then that” logic.

    Advanced Navigation Tips

    Once you’ve got the basics down, smart tech tutorials from 2025 show several advanced features worth exploring. Voice control becomes much more useful when you can control multiple devices with one command.

    Set up scenes or modes that control several devices at once. A “Movie Mode” might dim the lights, close smart blinds, and turn on the TV, all with one voice command or app tap.

    Regular maintenance keeps everything running smoothly. Update device firmware monthly, check battery levels in wireless devices, and clean sensors (like motion detectors) every few months.

    Smart home devices collect data about your usage patterns. Review these insights monthly to spot opportunities for better automation or energy savings.

    Security and Privacy Considerations

    IoT devices can be security risks if not set up properly. Change default passwords immediately; many devices come with passwords like “admin” or “123456” that hackers know.

    Enable two-factor authentication on your smart home apps. This adds an extra security step but prevents hackers from accessing your devices even if they get your password.

    Review what data your devices collect. Some smart home devices record conversations, track when you’re home, or monitor energy usage. Decide if you’re comfortable with this data collection and adjust privacy settings accordingly.

    Conclusion

    Smart technology transforms how we interact with our homes, but success depends on taking the right approach. Start small, choose compatible devices, and focus on solving real problems rather than buying gadgets just because they’re cool.

    The smart home market will keep growing, with new devices and features launching constantly. But the fundamentals covered in this smart home guide, strong WiFi, compatible ecosystems, and simple automation, remain the foundation of any successful setup.

    Remember that setting up a smart home is a process, not a one-time project. Build your system gradually, learn how each device works, and don’t be afraid to return products that don’t meet your needs. With patience and the right approach, home automation can genuinely make your daily life easier and more convenient.